28 February 2008

We have Bricks!

Progress on the house is happening at a steady pace, but nothing worthy of a post. The plumber has been to do the rough in, and the electrician to do the pre-wire. The windows arrived a few days ago, and the door this morning, although none have been installed yet. Then today there was a lot of noise outside, and low and behold, a truck with our bricks on!

They were unloaded by crane, and put at various points all around the house.

I kind of expected them to stack them all in one spot, but I guess this makes more sense. The bricklayers don't have to cart them all to the right spot, they're nearby. If you look through the door, you can see the windows inside, leaning on one of the walls.

I'm actually surprised at how quickly it's all happening now. It took us more than 8 months to just get through all the initial paperwork, and now the building is happening so fast. I would have thought that it was the longest bit, but apparently not.

Baking Bread

I used to buy all my bread. Ever since I became pregnant, and heard all about the side effects of many of the preservatives used, I was very careful to buy preservative free bread, but I still bought it. I don't eat that much, so I'd buy two loaves at a time, and freeze what I didn't eat immediately. It would last me about 2-3 weeks before I'd have to buy more. DH is gluten intolerant, so he can't eat it, and we haven't had much success in finding an edible gluten free bread yet.

Then we moved. There are no Brumbies or Bakers Delight bakeries here (those are the two that I know make preservative free bread). The only one is in the large shopping centre, that I try to avoid. This made buying bread a huge hassle, and I was continually running out.

Then one day at the markets, I saw a bread machine. $25, and I got it for $20, so I took it home to make some bread. I know breadmakers are the cheating way of making bread, and I would love to make bread by hand, but with a 3yo, the amount of time needed just isn't an option for me right now. Maybe when she is a little older, and able to follow directions, instead of tipping stuff into the bowl the moment my back is turned.

So far, I've made about half a dozen loaves, so I'm by no means an expert. I suspect I have a lot to learn. I'm just using a bread mix that I found in the supermarket, Lanuke wholemeal, and so far, nearly all of my loaves have been edible. They are a big heavy/moist, but heavenly hot from the breadmaker with butter and strawberry jam!

So, I thought I'd post a bit of a 'how to get started with breadmakers' thing, just for anyone who is thinking about giving it a go, but is unsure.

This is my breadmaker. It didn't come with a manual, so I had a look around online, and managed to find one that is from a more recent evolution of the same model. It has some differences, but I'm working on the fact that the basic procedures are the same.

Firstly, you need to choose a bread mix or recipe. I'm no help here, since I bought the only one that the supermarket had. I plan to try out more mixes, and hopefully eventually go for my own recipe, but this is a start.

Firstly, I like to get everything I'll need together. I put my flour and yeast into jars, since I had an attack of moths recently, but make sure I keep the packet for the measurements. If I happen to forget, my DD has written down what we need in her little notebook: water, flour, yeast. She likes to tick them off as we add them.

I also have a good variety of measuring cups/instruments. Apparently you have to be very exact with your measurement in breadmakers. The recipe I use calls for 415ml of water, so I used the graded measuring cup for that. My breadmaker instructions say to add the water first, then the flour, then the yeast in a well in the middle of the flour. That is so that the yeast doesn't begin to activate if you set it on the delay start function. The flour requires 3 1/2 cups, so I use both the 1 cup measure, and the half cup measure (whereas with making a cake, I'd just half fill the 1 cup).

That's all there is to it. Then it goes into the breadmaker, and you press a few buttons, and off it goes.

I like to check on it as it's rising, but be careful not to bump it, or it will sink. At about this stage, the fresh bread smell starts to permeate the house.

3 hours after the initial start, it beeps to tell me it's done. The insert comes out, and the bread sits in it for another 5 minutes.

Then I tip it out onto a rack, theoretically to cool.

But really, so that I can cut slices and slather them in butter and jam, and eat them while they're still hot. DD asks the whole time it's cooking if it's ready yet.

Does it get any better than this?

27 February 2008

Informal Learning

While we're not doing formal homeschooling until next year, when DD will be at the official age for prep, we certainly do lots of informal learning nearly every day. In the last few weeks, DD has shown a real interest in painting. Previously, she has painted scribbles for a minute or two at most, then grown bored. Now, we're getting actual paintings.

This was the first one. This is Harry and his Bucketful of Dinosaurs, just in case you don't recognise it. We couldn't fit all the dinosaurs on one page, so we had to do a second. There are six dinosaurs, and Harry, with his red hair. I was most impressed with these. I helped draw the bodies on a few of them, but she did the rest.

In the theme of dinosaurs, we bought some card and split pins at the newsagent, and made a model "Patsy", the apatosaurus from Harry. She loved this activity.

She then drew the same characters each day for about 3 days. Now she's moved onto other things. Today we have had whales, octopuses, and caterpillars.

This is a mummy whale (top), a daddy whale (bottom right), and a baby whale (bottom left). I just love the shape in the mummy whale, very whale like.

Then, with her new found fine motor skills, she wrote a sign. "Mummy, help me. I want to write stop."
Me: "Well you need to start with a 's'."
DD: "I've already done the 's' and the 't', what comes next?"

And she had too. With me giving her verbal instructions, she wrote this sign all by herself!

For anyone having trouble reading it, it says "Stop at Red Light". I'm amazed. She has written her name a couple of times in the past, and will type simple words like "hi" and her name to my friend in Canada, but this is the first time she's written like this. She has known most of the letter sounds for quite a while from her Jolly Phonics videos, which she just LOVED, and watched over and over, but she has shown a lot of reluctance to put them into words. We didn't push, figuring she would do it in her own time. She is the sort of child who doesn't like to do things until she is sure she can, so I knew she was quietly working away at this, and would seem to go from nothing to everything at once, and it looks like I was right.

She has been 'reading' simple first readers for a few weeks too. A very old set of PM readers that I bought for a song at the markets. I have a more modern set in a box somewhere, but probably she will be past them by the time I find them again. She also loves Dr Seuss, and will recite several other books that she knows by heart.

Also inspired by Harry, in particular the episode 'Origami', we had to look up some instructions for how to make origami critters. I point blank refused to even try a fan (Harry and his friends made a working electric one, beyond my capabilities I'm afraid!), so this was the next best thing.

Who is it that says that TV is bad for kids, look at what it has inspired in our house!

26 February 2008

Egg Update

We candled the eggs today. Basically, this means getting into a dark place, and using a light to shine through the egg, so you can see the shadow of it's contents. We used our maglight with a hand around the end to try to keep as much extraneous light in as possible. I didn't manage to get photos, it was a bit chaotic here, and the only way to get them would be to use the tripod and a long exposure. I might try again last night. However, there is a very good article on egg candling on Aussies Living Simply here, that has a great description and photos.

It is all looking good. Every one of the eggs had signs of development. A little blob on once side, with a darker blob in the middle. Some of them you could even see moving. I was a little concerned about having to turn the incubator off during our heat wave on Saturday, but it appears they haven't come to any harm from it.

It was amazing, seeing those little babies in there. And even seeing them move. Kind of like watching your own child on an ultrasound, except that you are more relaxed (and without the overwhelming need to use the bathroom!) I think it was a great thing for DD to see too. She seemed very interested for a few minutes, watching the eggs and touching them, before being distracted by playing games with the torch in the dark!

So looking forward to the 10th of March, when we should see them hatching!

Recipes

Well, the weather has jackknifed from a sweltering 36.5 degrees on Saturday, to a cool 22 degrees today. It's also raining, so I'm feeling quite chilly. I've lost one of my slippers, probably the dog next door thought it looked yummy and ran off with it, so I needed to come up with a solution for cold feet. I went searching for some socks, which helped slightly, but they're very thin, and I can still feel the cold from the cement through them. So I figured I'd knit some!

I did a quick search on the web, but all the patterns I could find were either knitted in the round (which I have no idea how to do, must learn), or or in 4 ply cotton, which is a bit much knitting for me. So I'm currently creating my own pattern. I'm about half way through the first slipper, and so far it seems to be going OK, but it's hard to really tell until it's done. If I can get them to work, I'll post the pattern in the next few days. (And pics of course.) I'm using one of the many many balls of 8 ply acrylic that I have in the shed, courtesy of my grandmother, who used to crochet until her fingers wouldn't do it anymore. Cost to me, nothing!

I haven't posted about this yet, but on Sunday, lemons were 6 for $1, so I bought a dozen, and did up some lemon recipes (I've been waiting for them to get to a nice low price for these). Firstly, I made Rhonda's Lemon Cordial recipe. I'm not a big fan of lemon drinks myself, but DH loves Lift. While this is better than his previous favourite drink, Coke, it's still a little too full of colours and flavours for my taste (not to mention expensive!), so I figured if I could find a substitute, it would be good. Unfortunately he's not a big fan of it. I suspect because it lacks fizz.

Lemon Butter

Next I moved onto Lemon Butter. I used my grandmother's recipe, sent to me by my mum.

1 pound of sugar (2 cups)
1/4 pound of butter (2 tablespoons)
6 eggs
juice and rind of 3 lemons

Add well beaten eggs to the sugar. Add juice and rind of lemons, and butter. Stir gently over slow fire until thick as honey. Great for sandwich spread or tartlet filling.

Now personally, I didn't have a slow fire handy, but it worked quite well on my electric stove. A few hints and tips, firstly, don't put anything on the stove (or fire), until you've juiced and grated all those lemons. I thought I'd do it quickly enough that I could save time and do both at once, but all I ended up doing was burning my butter and eggs. I managed to salvage most of it by transferring to a new saucepan, and pushed on.

With the eggs, make sure you beat them well. I'd suggest an egg beater. I just whisked them with a fork, and ended up with bits of cooked egg white in the lemon butter. If this happens to you, you can strain it out, and as an added plus, this will get rid of any remaining burnt bits as well!

To grate the rind, you use the back of your grater, the one with what looks like little holes punched with a nail from the inside. Grate just the top yellow coating off the lemons, not the white. Apparently (according to my mum), the white is bitter. I didn't try this to find out. I did though, manage to grate some of my thumb. Not good. Lemon juice stings!

However, in spite of all this, it seems to have turned out OK, and I'm really looking forward to trying my lovely lemon but some home made bread. Pity the lot I made that day didn't rise, I suspect due to my beautiful daughter checking on it a bit too enthusiastically.

Chocolate Fudge

Our final job for the day was to make some chocolate fudge! This recipe is my mother's and is a popular one at fetes, and with kids and adults alike. But be warned, it is NOT healthy.

2 cups of sugar
1/2 cup of milk
1 tablespoon of butter
2 tablespoons of cocoa
butter for greasing
a few drops of vanilla

Put all ingredients except vanilla into a saucepan and stir over medium heat until it boils. Reduce heat, and boil steadily until thick (5-7 minutes). Remove from heat, add vanilla, and beat till creamy. Pour into greased sweet dish. When partially set, cut into squares.

Hints and tips: If rice milk is substituted for the milk, and nutalex for the butter, this is a great dairy free chocolate substitute. I can't tell the difference taste wise. (And neither could my dad, who is very picky about his chocolate fudge.)

5-7 minutes is an almost exact time. You can check if it is ready by scraping the edge of the saucepan, if the fudge there is gritty, it is ready. If you pour it into the dish and it is sticky and doesn't set, you can put it back on for longer.

Grease your sweet dish before you start. You can't leave the fudge unattended at all. If it burns, the whole lot is ruined.

Our family has used a rectangular Pyrex dish, now know as the 'fudge dish' for this recipe for years. Ownership of this dish has been hotly contested, and luckily we have found extras in second hand shops for everyone. I don't know if they're available new or not, but I haven't seen them anywhere. If you get hold of one, hang onto it!

But best of all, is licking the spoon. After you've poured the fudge into the dish, there will be half set fudge all around the saucepan. (If you don't scrape it out too thoroughly, there is even more!) This is the best bit. Use your wooden spoon to scrape as much as you can onto the spoon. Best eaten just hot enough that it almost (but not quite) burns your tongue.

Enjoy!

24 February 2008

Making dolls

I've been making dolls for as long as I can remember. My mum tells me, and I have vague memories of making dolls clothes out of wrapping paper and sticky tape before I could sew. I would have been about 5 or 6 at most. I made my first real cloth doll when I was 7, on my grandmother's old treadle sewing machine.

When I grew up and left home, I discovered I really was too old for dolls, and I had little excuse to make them. Then I had a daughter. Ahh, what a wonderful thing a daughter is. Of course, with a baby and a toddler, the last thing I had time for was sewing. But she is growing up, and finally is getting interested in helping me. So I've spent the last little while making a fairy doll for her little friend's birthday present, and of course, a mermaid for little miss so she doesn't feel left out.

I tend to make things by trial and error rather than using any specific pattern, so this isn't really going to be a tutorial so much as a record of what I did this time and how it worked. Maybe it will inspire someone.

I started off searching the web for fairy doll patterns, and that is how I discovered Waldorf dolls. Oh they are so beautiful. Simple, yet detailed, and with such a childish innocence. I was hooked. I found a few sites that explained some of the process, enough to get me started, and from their I improvised. If you're looking for instructions, The Silver Penny has pictures and instructions on making the heads, and Echoes of a Dream has a great set of instructions and pictures for making the whole doll.

So, firstly making the heads. I kind of amalgamated the instructions at both of the above sites. I didn't have any wool for the stuffing, so I used poly filling, which I have heaps of. I wound it into a ball, and then tied a square of quilt batting over the top. My daughter was most intrigued by the process, and continually wanted to 'help'. Here she is helping to hold them while I photographed them.

Then I used some cotton string to shape the faces. Like this.

Then I did very little for several days. This is a very important step in the process.

My next challenge was some material for the bodies. Although I compromised on the stuffing, I wanted this to be cotton. Unfortunately I had nothing in a suitable colour. I tried the local Lincraft, and they had NO interlock at all, and DD got heartily bored of staring at all the wool, none of which was really suitable for hair.

On to Spotlight. I had more luck finding interlock here, and even 100% cotton, once I realised I had to look in the baby material aisle! Unfortunately, none of it was skin coloured. I finally settled on a yellow, even though I knew it wasn't quite right. Home to my fabric paint, and several subtle applications of pink later, I had something pretty close.

Sewing the cover for the head took a couple of goes of sewing, trying it on, making it smaller, and trying it on again. Finally got it right though. Hmm, it looks very yellow in this pic. That will teach me to play with the colour balance in photoshop too much!

Once the basic head was done, I moved onto the body. Here are the pieces for the mermaid, which is why there are no legs.

They were pretty simple shapes. I've made some very detailed bodies in my time, but for young kids, I think simple is best.

Here is the finished body, with coffee cup included for a size comparison. This doll is designed to live in the little girl's dollhouse, so this will be the perfect size.

Next the face. A simple, Waldorf face. The idea is to set out the eyes and mouth in an equilateral triangle, and it works very well. You place pins first to get the position, then embroider the features.

Next comes the tricky part, hair! I've read in several places about embroidered caps with wool hooked through it, but haven't found any hints of free patterns. So I figured I'd give it a go. I couldn't find any suitable wool from natural fibres, so I've used a 4 play rainbow crochet cotton that I found at Spotlight.

I'm not very good at crochet, so I can't give you a pattern, but I'll try to explain what I did.

I started off with 4 chain, joined in a circle, then worked 6 double crochet into the circle. Next row I again did 6 double crochet into each stitch. I figured I needed to enlarge it a bit before making it cap shaped, so for the next 3-4 rows I alternated between one and two double crochet into each stitch, then went back to one double crochet into each stitch to bring it into a cap shape. For the second one for the mermaid, I was even more random, switching between the 1-2 pattern and the one per stitch as it seemed to need it. Here is how it shaped to the head.

Once the cap was made, it was time to add the strands of hair. I've you've ever done latch hook, it's kind of like that. I do have some latch hooks in the shed, but I think they would have been too big for this, so I just used a crochet hook like this:

Once I had done the first row around the edge, I sewed it on. I decided to pin it before sewing it to make sure it was in the right place (and I have an aversion to pinning, so if I pin, you know it's a good idea).

I just used normal sewing cotton and slip stitched it around the edge.

Finally, I hooked in the rest of the hair. This was very time consuming, and I kept losing track of where I was hooking, but the end result was worth it. The hair can now be styled any way you like, and is brushable with a brush with rounded ends.Here she is, the finished doll!

Then, of course, there were clothes to make.

I wanted something pretty and fairyish, and luckily for me DD had had a lace dying episode the previous day. I had limited her colours to yellow and pink, and they were prefect for this project. It was thick, doubled sided lace, and I cut it down the middle, slightly off centre, and gathered the two pieces together. Length of lace was as much as I could get that was continuously coloured!

At full gather, it made a nice circle like this. Isn't it pretty?

I still had no idea what to do for the bodice, so finally I turned to my trusty ribbon stash.

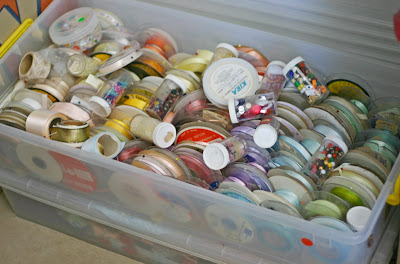
No, seriously, I'm not a hoarder. Craft stuff doesn't count, right? No, I got lucky. My mum bought the stock of a craft store going out of business a few years ago, so I have boxes and boxes of this stuff. I rarely have to go to the shop for laces, ribbons, elastic or thread. I have it all right here! My own personal craft store.

OK, back to the regularly scheduled program. Now where was I? Oh yes, bodice. I won't bore you with the details, because I didn't take pictures, and totally made it up as I went along. But here is the finished dress.

Now all that is missing is wings! This was quick and easy. I drew a quick pattern on some printer paper, pinned it to a cotton skirt I picked up at the second hand shop, and didn't even bother to cut, just sewed around the edge.

Then cut around the edges, and turned it right way out. Plain pink wings, hmm, that seems a little boring...

Ahh, that's better. Now a couple of loops to put over her arms, just like the kids dress up wings, and she's ready to go.

Scroll down for a pic of the finished doll right before we headed off to the party in the next (or should that be previous?) post.

I haven't quite finished DD's mermaid yet, still procrastinating on finishing the hair. Will post pics when it is done.

23 February 2008

Fairy Party!

Today was the hottest day of the summer (so far). By 8am, it was 30 degrees, by midday, it had hit 36.5 inside our shed here. I had to turn the incubator off, as it was getting too hot for the eggs!

After lunch, we headed to a friends place for her little girl's 2nd birthday fairy party. I wasn't sure how DD was going to go, as she's always been very cautious of new situations and people, but she had a ball! She'd been really looking forward to it, and got all dressed up, and even happily handed over her present to the birthday girl. She played with the other kids, ate too many lollies, and generally did all the things you're supposed to at parties.

Our present, a Waldorf inspired fairy doll, went down well. I'm pretty pleased with how it turned out myself!

I have lots of photos of the making up, but they haven't been edited yet, so I'll hopefully get onto that tomorrow. Hopefully it will be a bit cooler!

The good news about this weather though, is it's just what my watermelon needs to make sugar!

21 February 2008

We have a Roof!

Here it is, a roof! It's actually starting to look like a house!

I have another post about gardening half written, but it's late, and I need sleep, so I'll finish it in the morning.

No Dig Gardening

If you know me, you'll know that I'm not a big fan of hard work. Don't get me wrong, I love making things and I love that feeling of achievement when you create something out of nothing, or achieve what you set out to do. But I don't like that hard labour stuff. That's why I'm a huge proponent of no dig gardening. It's the way my mum always gardened growing up, and it worked for her, and it's working fine for me!

Sounds great huh? So how do you do it you ask. It's easy.

You will need:
  • Old newspapers
  • Compost, manure, or any type of fertilizer
  • Hay or grass for mulch
  • Water
Firstly, pick out a spot for your garden. I was making another rectangular bed next to my existing ones. I've added in the green lines in photoshop to show you. I didn't mark out the bed, but you could easily do this with string or sticks or anything if you wanted it exact. We mowed the area beforehand, as the grass here was out of control from all the rain. The ground was still very wet, but if it's dry, it's a good idea to give it a through watering (or as through as you can if you have water restrictions) beforehand. I also sprinkled some Dolomite around, as our soil seems to be deficient in calcium.

Firstly, start to spread out the paper in the area you want to cover. Depending on the strength of your grass, it will need to be anywhere from 3 to 6 sheets thick. This grass is evil stuff, so mine was about 5-6 sheets thick (I don't get too exact about it).

The sheets should overlap by a couple of inches, so the grass can't grow between them. If it's windy, you'll want something to stop it blowing away. Handfuls of grass, straw or compost works well.

About half way through, I realised I had a bale of straw sitting there, and I didn't need to run around the lawn picking up the newly mown grass.

Once the paper was down, I collected a bucketful of mostly done compost.

And sprinkled it around the newspaper. I also added some handfuls of composted chicken manure that I bought at the garden shop a while ago.

Then more straw. Nice and thick this time.

And more straw! It should end up about 4-5 inches thick. It will compact as it breaks down.

Once the hay bale was gone, I moved the garden bed up past it, to the edge of the watermelon plants that were growing there. Here is the finished product. Now it should be given another good watering in. I didn't bother though, as it was bound to rain again, which of course, it did.

If you want to put some edgings around, they should go on top of the paper, so that the grass can't grow between the paper and the edge. I don't have any right now though.
Now it's ready for planting. I don't dig through he straw to plant, just put a hole in the straw, and put some dirt, compost or potting mix into the hole, and plant either seeds or seedlings directly in there. The plants roots will find their way down through the newspaper and into the soil as they grow and it breaks down, and by then, the grass should all be dead.

I plan on putting some pineapple tops in here, as well as maybe some broccoli/cauliflower, and who knows what else. I'll have to see when the time comes. It's very hot here again now, so the bed has been lying unplanted for a while. Once this heatwave passes, I'll think about it then.